I cleaned up the dusty workshop first to avoid a top coat of resin being ruined by picking up dust floating in the air. To be able to apply the resin I strung the frame up from the ceiling so it was suspended in the air and I could reach everywhere. I had never done this before so I mixed plenty of resin to be sure I didn’t run out before the end. So with a few spare paint brushes at the ready I started applying the resin working from the top down and trying to apply it as evenly as possible then move on and leave it alone. The dull matt finish of the frame tubes immediately looked beautiful with a shiny wet gloss coat. I couldn’t wait for it to dry.

When it was dry there were a few ripples where too much resin had flowed out of place but nothing too bad for a first time and not worth giving more time to. We just wanted to build the tandem and ride asap!

A few high and low spots in the carbon joint wrapping were visible but they were only cosmetic and the frame was only for us to ride so I decided to leave them. By the time we added components, decals, bikepacking bags and ourselves onto the tandem, any frame blemishes wouldn’t be seen anyway. Just a frame that was attractive and worked was our aim for this first attempt at frame building.
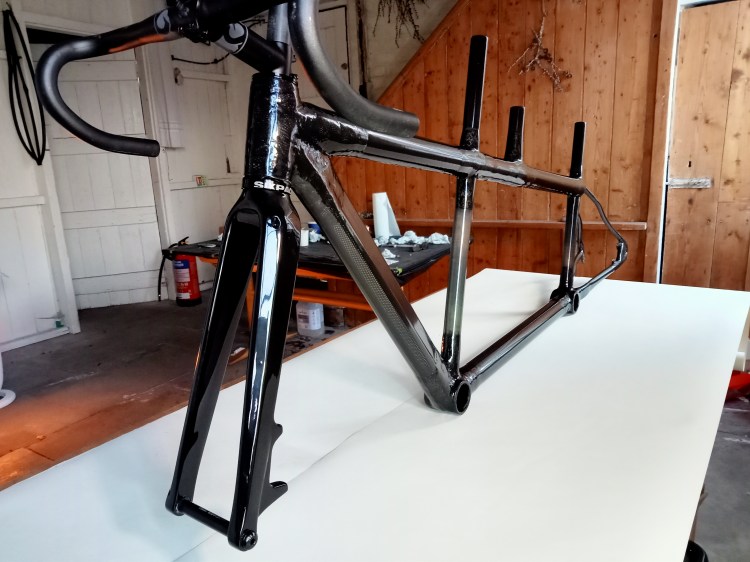
Photo: Frame after glass coat resin had cured.

Photo: Some high and low spots were visible but not worth trying to correct. We wanted to get out and ride!
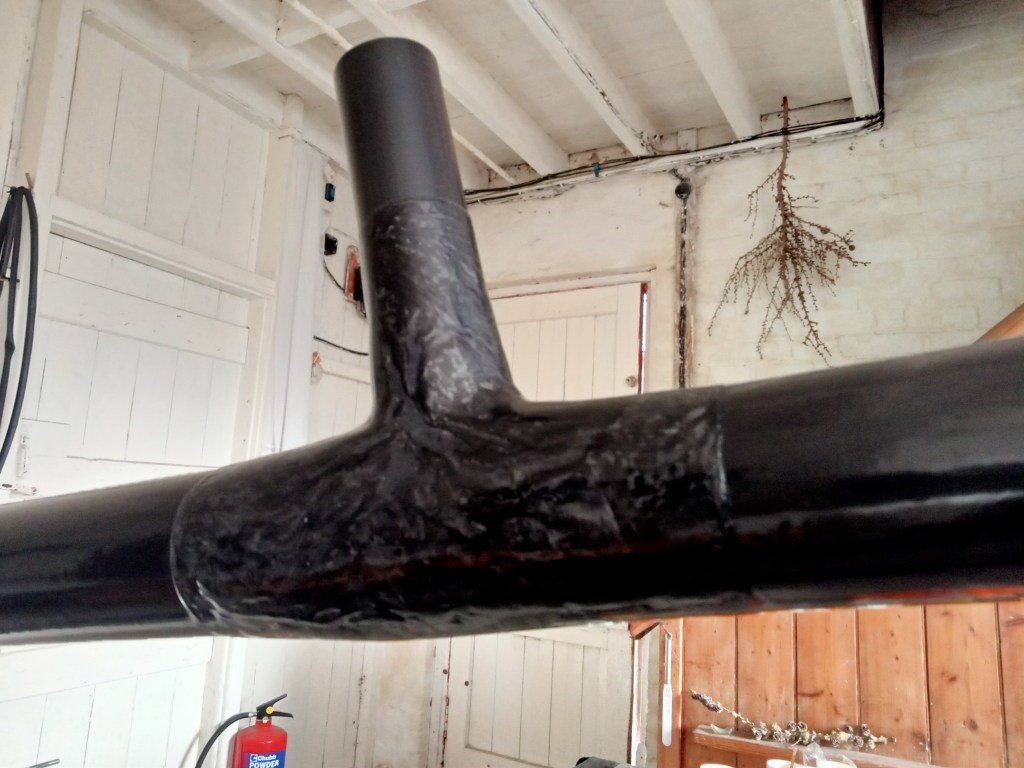
Photo: For a first attempt at using resin and build a frame it wasn’t perfect but I was pleased to have achieved a frame that looked good and had the right geometry.

