Gluing the frame together with correct geometry was a challenge and an achievement but strengthening the frame joints so it would be strong and safe to ride was a bigger technical challenge and would have unthinkable consequences if it went wrong. Research had shown the best techniques involved using an autoclave oven and that was far beyond my budget but I found inspiration for low cost, low tech techniques using wet layup that I could try as a novice. Laying cloth in the right directions across the joints to resist the loading of riders and compressing the wet layup while it cured to bond it into a one piece composite part seemed the two main goals. I searched websites for carbon being used by model plane builders, bamboo bikes, car parts, commercial and home builders, and looked for techniques I could afford and achieve as a novice. Simpicity was the key along with some over engineering to maximise safety margins and compensate for the low tech approach. It would be low tech but high labour.
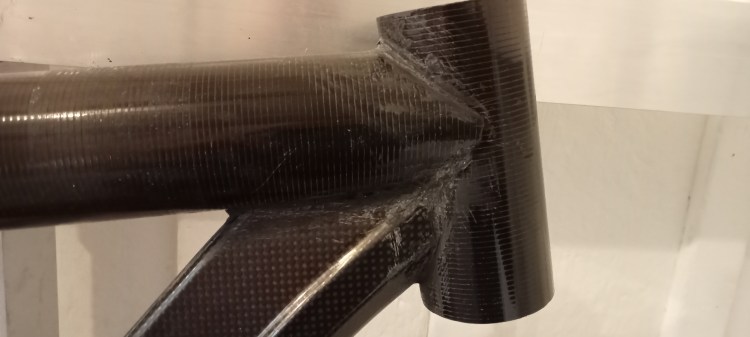
Photo: Glued joint before being prepared for wrapping with wet layup carbon cloth.
I first tried extra large vacuum bags but bagging such a large item for each time I wanted to form a joint was costly and difficult to get bags to seal. It was all too much for someone doing this in their spare time, having a few hours spare after work. It needed to be simpler.
Simple proved to be the most achievable in my limited spare time so I adopted the principles of bamboo bike building to wrap the joints tightly with wet layup and bind that tightly with tape while the resin cured. This way I could address each joint individually and the completed strength would still be within strength and safety margins as proved by other successful products built in the same way.
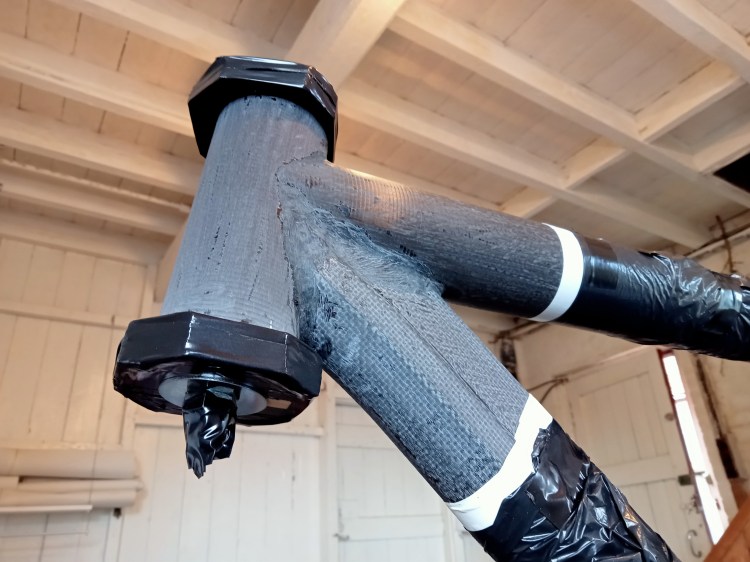
Photo: Head shell joint sanded and prepared for joint wrapping with wet layup cloth.
As an amateur it also made it easier to build up the joint in layers to try and maintain quality. Forming a joint with a few layers at a time then repeating the process was time consuming but it helped to avoid ripples or voids in the layers when trying to do too many layers at once. I couldn’t spend money so I’d have to spend my spare time.
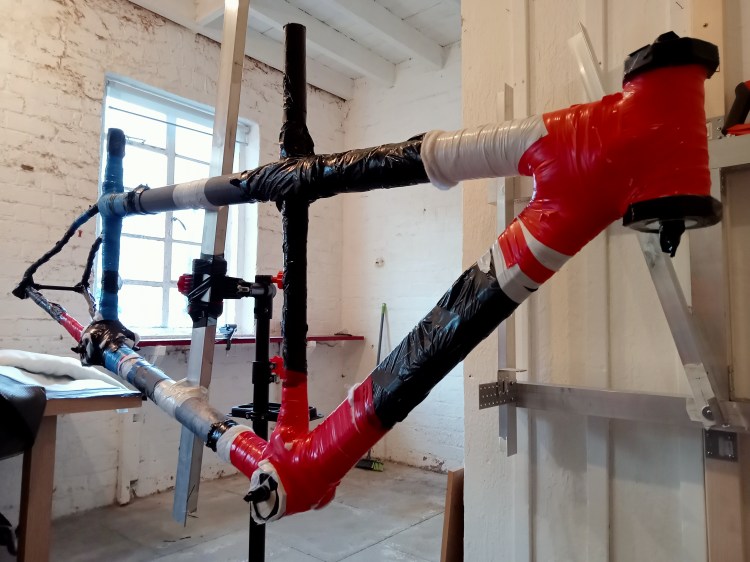
Photo: Frame joints wrapped with wet layup carbon cloth and compressed with tightly bound electrical tape.
Wet layup is a messy business and needs plenty of space to layout materials, wet up the cloth and try to manage the work area to prevent everything being covered in resin, including me. After a few messy starts I developed a system of working that minimised wet resin chaos. Preparing everything in advance with each stage carefully planned was key along with allowing plenty of time to avoid rushing.
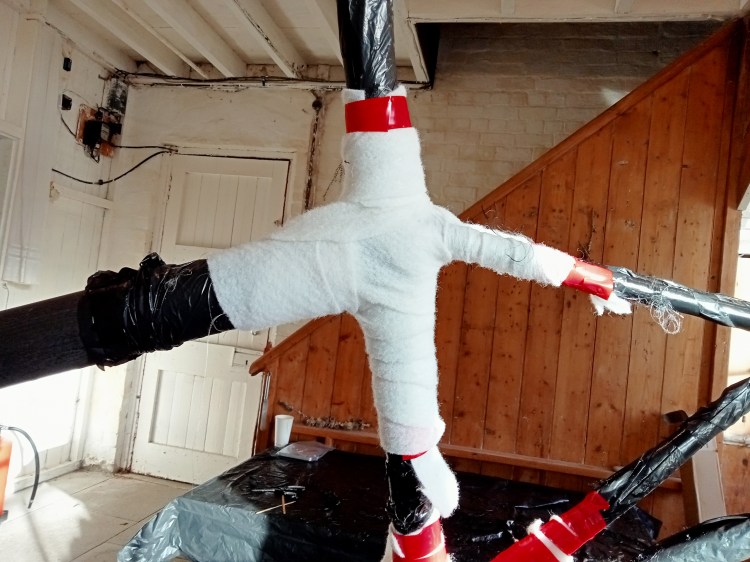
Photo: Wet carbon joint wrapped with breather cloth before being bound tightly with tape.
I probably used up Scotland’s supply of electrical tape but it is cheap and versatile and for a beginner, applying a few layers at a time, mistakes can be corrected and things can never go too wrong. It’s a good method to try first to see if working with carbon and making a bike frame is for you, without too much initial outlay.
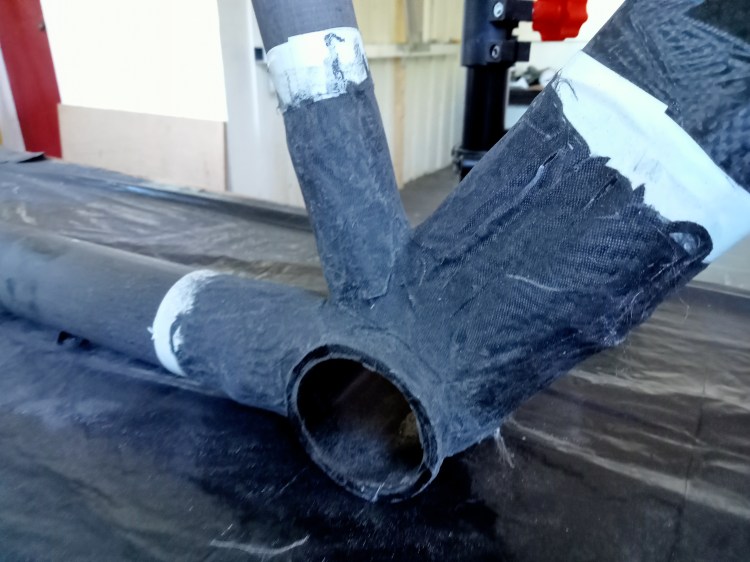
Photo: Joint after the resin has cured and been unwrapped. Unfortunately some ripples in the outer layer needed sanding flat.
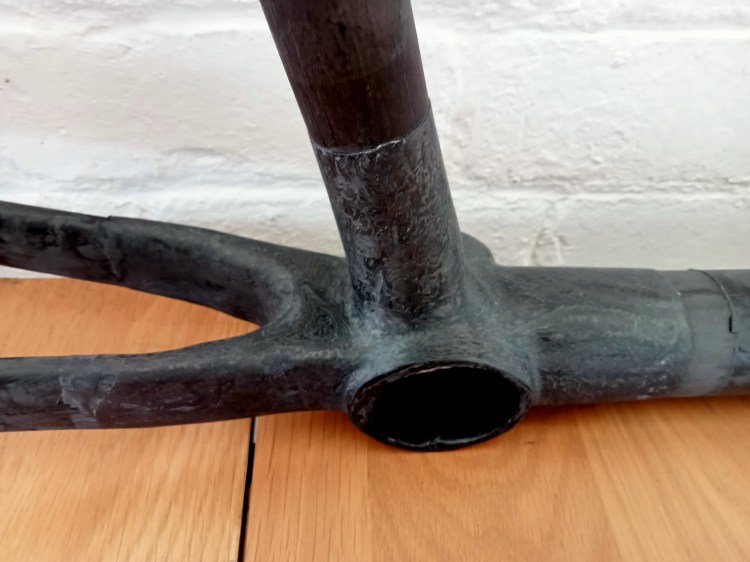
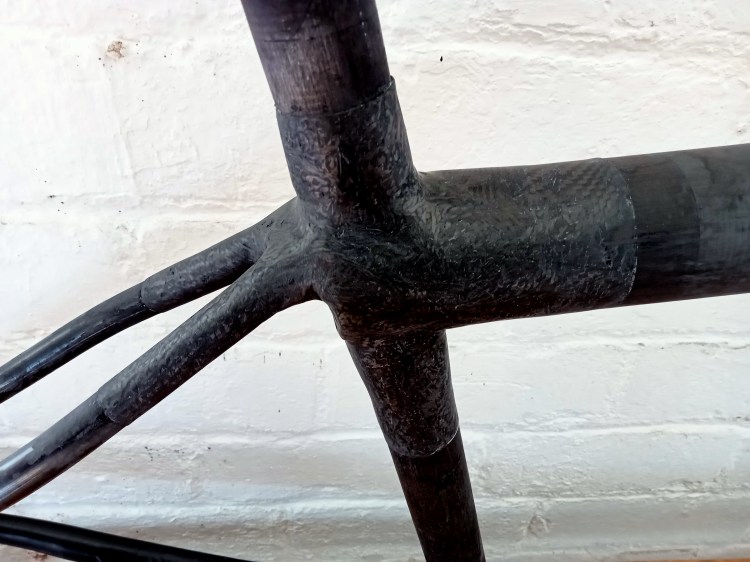
Photo: Cured joints after being sanded.
